Wooden Jack Puzzle
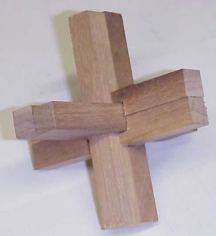
This project builds a 6 piece wooden puzzle that when assembled makes
a fully symmetrical jack (3 dimensional "+"). The design is copied
from a cast aluminum version I had as a child. I expect the puzzle is
at least 50 years old, and thus is well outside any patent that may
have existed. I've seen other versions of this puzzle, in wood, but
they use different piece shapes. I like this version because there
are only 4 different pieces and the pieces are deceptively simple.
I recently (6/99) discovered that this type of puzzle is commonly called a Six-Piece Burr
Puzzle, and that there are sites
that discuss it. There are 314 similar puzzles, and this is apparently the most symmetrical
and fewest different pieces. It's #2 in the list at the IBM site.
I still think it's the most interesting because of
it's simplicity.
|
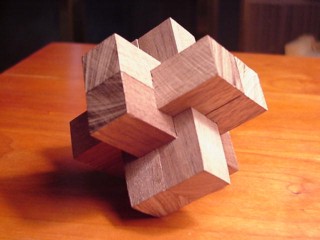
I've built the puzzle as a "burr", as shown on the right.
This is made from 3/4" thick pieces of walnut instead
of the 1/2" thick pieces I use for the jack puzzle.
I leave the puzzles unfinished which might cause shrinkage/expansion problems
but has worked fine for me so far. The natural skin oils tends to lubricate the
pieces so the puzzle works smoother over time. |
 |
|
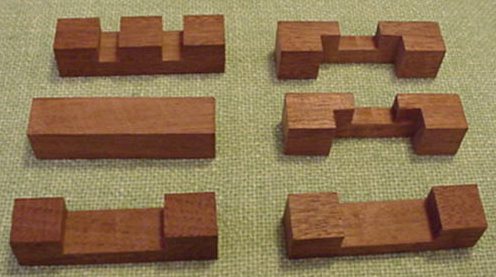
When disassembled, the puzzles look like this. The burr puzzle is shown. |
 |
I can build this puzzle in about 30 minutes on my
Shopsmith Mark V from
a single block of hardwood.
Lots of people won't be able to solve it correctly
in that amount of time.
Here's plans of the
first four pieces, A, B, and two of C, and of the
last two pieces, both D.
Cutting hints (I'm still perfecting it!):
- I cut all pieces from a single board. First I plane the board (I
used my Shopsmith jointer, but I have a planer now)
to 1/2" thick, as accurately as possible.
- I rip the board into 1/2" wide strips. I use the featherboard to
hold the board firmly against the fence while ripping, and the
pushstick to keep my fingers out of the way. Cut them slightly
oversized, and then sand them to be the same width as they are thick.
- Cut 6 4" long pieces. For best appearance, be certain the lengths
are exactly the same.
- For the dados, I use a stacked dado set to 1/4". I adjust the
depth to slightly under 1/4" and clean up cut with sandpaper.
I've made a jig to accurately and safely push the workpiece
through the cutter. I mounted a board on the mitre gauge that extends
about 4" beyond the blade. An adjustable stop block sets the position
of the cut, while another block above the workpiece prevents it from
riding up and getting an insufficiently deep cut. I cut all the dados
1.5" from the end first, advance the stop block .25", then cut all
the dados starting 1.75" from the end, and so forth.
Improved Technique
|
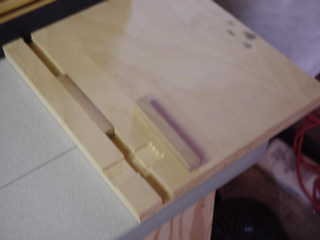
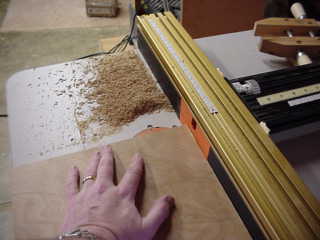
I've made some improvements to the technique listed above, by using my router table
rather than the stacked dado to do the cutting. The jig I use is much more secure
than the one I used with the saw. It consists of a sheet of plywood with a dado the
same width and depth of the puzzle piece. A spare piece
screwed in place, so that the piece to be cut can be placed in the dado and will not
move. |
 |
|
The piece is cut by routing in the other direction on the table, moving the
positioner a multiple of 1/4" between cuts. This operation is quickly done using
my Jointech Cabinetmaker System (now out of business). Note that the
large pile of sawdust is caused by me having the shop vac connected on "blow" rather than
"suck". When it is connected correctly, all the sawdust magically disappears.
|
 |
|
The finished puzzle was a tight fit, but did not require any additional sanding
to get it together. The edges were much cleaner than the dado could manage.
It was faster to cut as well. |
 |
Can't solve it? Here's the
solution.